


Welcome to the world of nails, where beauty and creativity come to life at your fingertips. In this extensive guide, we will delve into everything you need to know about nails, from their anatomy and care to the latest trends in nail art and maintenance. Whether you’re a nail enthusiast, a professional nail technician, or simply someone looking to up their nail game, this article has got you covered.
Introduction
What Are Nails?
Nails are hard, thin, and pointed structures that are primarily composed of a protein called keratin. They are found on the fingers and toes of most humans and play various roles in protecting the fingertips and toes, providing support for the tips of the digits, and aiding in tasks that involve gripping and manipulating objects.
The human nail consists of several parts:
- Nail Plate: This is the visible part of the nail and is composed of tightly packed layers of dead, hardened keratin cells. It is the part of the nail that you can see and decorate with nail polish or nail art.
- Nail Bed: The nail plate rests on the nail bed, which is the soft, vascular tissue underneath the nail. The blood vessels in the nail bed give the nail its pinkish color.
- Cuticle: The cuticle is a thin layer of skin that overlaps the base of the nail plate and helps seal the nail matrix (the tissue that generates new nail cells) to protect it from infection.
- Lunula: The lunula is the crescent-shaped, whitish area at the base of the nail, often seen on the thumbnail. It is a visible part of the nail matrix.
- Nail Matrix: The nail matrix is the tissue located beneath the cuticle and lunula that produces new nail cells. These cells push older ones outward, contributing to nail growth.
- Nail Folds: Nail folds are the skin that surrounds and supports the nail on three sides, helping to anchor it in place.
Importance of Nails
Nails serve several vital functions in the human body and play a role in both physical and functional aspects of our lives. Here are some of the critical importance of nails:
- Protection: Nails help protect the fingertips and toes from injuries and external trauma. They act as a barrier, preventing damage to the sensitive nail bed and underlying tissues.
- Manipulation and Dexterity: Nails enhance our ability to perform fine motor skills and delicate tasks. They provide grip and precision when handling small objects, typing on a keyboard, or playing musical instruments.
- Sensory Function: Nails have a high concentration of nerve endings, especially at their base near the nail bed. This makes them sensitive to touch, pressure, and temperature changes, allowing us to interact with our environment and sense potential dangers.
- Support and Structure: Nails provide structural support to the fingertips and toes, helping them maintain their shape and function. They also help distribute pressure evenly across the fingertips when gripping objects.
- Grooming and Personal Expression: Nails are an essential aspect of personal grooming and self-expression. Many people choose to trim, shape, and decorate their nails with nail polish or nail art as a form of self-care and creative expression.
- Indicator of Health: The condition of nails can provide valuable insights into a person’s overall health. Changes in nail color, texture, or growth patterns can sometimes be early signs of underlying medical conditions or nutritional deficiencies.
- Tool for Scratching: Nails can serve as a natural tool for scratching and relieving itchiness or discomfort on the skin’s surface.
- Social and Cultural Significance: Nails can hold cultural and social significance. Different cultures may have specific grooming and decorating practices related to nails, and the appearance of nails can convey cultural or social messages.
- Aesthetic Appeal: Well-maintained nails can contribute to a person’s overall appearance and confidence. Many people take pride in having clean, healthy, and attractive nails.
Different Types of Nails
There are various types of nails, and they differ based on their size, shape, and intended use. Here are some of the different kinds of nails commonly used in construction and various other applications:
- Common Nails: These are the standard nails used in general construction. They have a smooth, cylindrical shaft and a flat, tapered head. Common nails come in various lengths to suit different purposes.
- Finish Nails: Finish nails are designed for finishing carpentry work and woodworking projects. They have a smaller diameter than common nails and a small, tapered head that can be easily concealed with putty or wood filler.
- Brad Nails: Brad nails are even thinner than finish nails and are often used for attaching thin pieces of wood, trim, or molding. They leave minimal visible holes and are suitable for delicate work.
- Casing Nails: Casing nails are used to attach door and window casings to framing. They have a medium-sized head and are often coated with a layer of resin to increase holding power.
- Roofing Nails: These nails are designed explicitly for securing roofing materials such as shingles, felt paper, and roofing tiles. They have a broad, flat head and a short shank, often with a twist or ribbed pattern to improve grip.
- Common Wire Nails: Common wire nails are similar to common nails but have a thinner gauge, making them suitable for lighter construction and woodworking applications.
- Concrete Nails: Concrete nails are designed for fastening materials to concrete or masonry surfaces. They have a fluted shaft or grooves for improved grip in hard materials.
- Masonry Nails: These are used for attaching items to masonry walls or surfaces. Masonry nails have a hardened steel shaft and a blunted point to prevent splitting.
- Duplex Nails: Duplex nails have two heads instead of one. They are often used in temporary construction applications, such as concrete forms, where the nails need to be easily removed.
- Panel Pins: Panel pins are okay. Slender nails are commonly used in cabinetmaking and woodworking for attaching thin panels, moldings, or trim.
- Copper Nails: Copper nails are resistant to corrosion and are used in applications where rust could be a problem, such as marine or outdoor construction.
- Ring Shank Nails: These nails have rings or spirals along the shaft to provide enhanced holding power. They are commonly used in framing and other structural applications.
- Galvanized Nails: Galvanized nails are coated with a layer of zinc to resist rust and corrosion, making them suitable for outdoor and marine applications.
- Stainless Steel Nails: Stainless steel nails are highly resistant to corrosion and are used in situations where maximum durability is required, such as in coastal areas or near water.
- Hardwood Nails: These nails have a special hardened tip to penetrate hardwoods without bending or breaking.
Anatomy of Nails
The anatomy of a human nail is a complex structure with several distinct parts. Here’s a breakdown of the main components of a nail:
- Nail Plate: The nail plate is the visible, challenging, and flat portion of the nail that covers the fingertip or toe. It is made up of layers of compacted, dead keratin cells. The nail plate is what you typically see and can be trimmed, shaped, and decorated with nail polish or nail art.
- Nail Matrix: The nail matrix is the tissue located beneath the base of the nail, underneath the cuticle. It is a vital part of nail growth and is responsible for producing new nail cells. These new cells push older ones outward, contributing to the length and growth of the nail.
- Cuticle: The cuticle is a thin layer of skin that overlaps the base of the nail plate and the nail matrix. Its primary function is to protect the nail matrix from infections and debris.
- Lunula: The lunula is the pale, crescent-shaped area at the base of the nail, often seen on the thumbnail. It is a visible part of the nail matrix and is more noticeable on some people’s nails than others.
- Nail Bed: The nail bed is the vascular tissue that lies beneath the nail plate. It contains blood vessels and helps nourish the nail as it grows. The blood flow in the nail bed gives the nail its pinkish or reddish color.
- Nail Folds: The nail folds are the surrounding skin that supports and frames the nail on three sides. They help anchor the nail in place and protect it from injury.
- Hyponychium: The hyponychium is the tissue located at the very tip of the finger or toe, just under the free edge of the nail. It forms a protective barrier between the nail bed and the outside environment, preventing dirt and debris from getting under the nail.
- Eponychium: The eponychium, often referred to as the “cuticle” colloquially, is the small fold of skin that extends from the proximal nail fold onto the base of the nail. It is responsible for sealing and protecting the space between the nail matrix and the nail plate.
- Perionychium: The perionychium is the skin that surrounds the nail on the sides, and it includes both the nail folds and the cuticle.
- Nail Root: The nail root is the portion of the nail matrix that is hidden beneath the skin at the base of the nail. It is where nail growth originates.
Nail Care
Tips for Healthy Nails
Maintaining healthy nails involves good hygiene, proper care, and attention to your overall well-being. Here are some tips for keeping your nails in good condition:
- Keep Nails Clean: Regularly clean your nails and the surrounding skin with a gentle nail brush or a soft toothbrush to remove dirt, debris, and bacteria. Use a mild soap and warm water, and be sure to dry your nails thoroughly after washing.
- Trim and Shape Nails: Trim your nails regularly to keep them at a manageable length. Use a nail clipper or nail scissors to cut straight across, then gently round the corners to prevent ingrown nails. Avoid cutting nails too short to reduce the risk of infection.
- Moisturize: Apply a moisturizing hand and nail cream or lotion daily to keep your nails and surrounding skin hydrated. Pay attention to the cuticles and the skin around the nails to prevent dryness and cracking.
- Don’t Overdo It: Avoid excessive use of harsh nail products, including nail polish removers that contain acetone. Limit the use of artificial nails and extensions, as they can weaken natural nails over time.
- Protect Nails: Wear gloves when doing household chores that involve water, cleaning chemicals, or prolonged exposure to moisture. This can help prevent nails from becoming brittle and weak.
- Use a Base Coat: When applying nail polish, use a clear base coat to protect your nails from staining and to provide a smooth surface for the color polish.
- Limit Use of Nail Hardeners: While nail hardeners can be helpful for some people with weak nails, they can also make nails more brittle over time if used excessively. Consult with a dermatologist or nail specialist if you’re considering using nail hardeners regularly.
- Maintain a Balanced Diet: A healthy diet rich in vitamins, minerals, and protein can promote strong and healthy nails. Include foods like leafy greens, lean proteins, biotin-rich foods, and plenty of fruits and vegetables in your diet.
- Stay Hydrated: Proper hydration is essential for overall health, including the health of your nails. Drink plenty of water to keep your nails and skin well-hydrated.
- Avoid Nail Biting and Picking: These habits can damage nails and the surrounding skin, making them more susceptible to infections and other issues. Consider using nail-biting deterrent products if needed.
- Be Gentle: Use your nails for their intended purpose, such as grasping or picking things, rather than as tools for scraping, opening containers, or prying objects. Avoid activities that could lead to nail trauma.
- Consult a Professional: If you notice any changes in the color, texture, or shape of your nails, or if you have persistent nail problems like fungal infections or ingrown nails, consult a dermatologist or a nail specialist for proper diagnosis and treatment.
Common Nail Problems
Nail problems can arise for various reasons, including trauma, fungal or bacterial infections, underlying medical conditions, or improper nail care. Here are some common nail problems that people may experience:
- Ingrown Toenails: Ingrown toenails occur when the edge of a toenail grows into the surrounding skin, leading to pain, redness, swelling, and potential infection. Proper toenail trimming and wearing well-fitting shoes can help prevent this issue.
- Fungal Nail Infections: Fungal nail infections, also known as onychomycosis, can cause thickening, discoloration (yellow or white), and brittleness of the nails. Dermatophyte fungi often cause them and can be challenging to treat. Antifungal medications, either topical or oral, may be necessary.
- Bacterial Nail Infections: Bacterial infections around or under the nail can lead to symptoms like pain, redness, and swelling. Pus may also develop. These infections are typically treated with antibiotics prescribed by a healthcare professional.
- Nail Psoriasis: Psoriasis can affect the nails, causing pitting (small depressions or dents), thickening, discoloration, and separation of the nail from the nail bed. Managing psoriasis with topical treatments or systemic medications can help improve nail health.
- Brittle Nails: Brittle nails are prone to splitting and breaking. They may result from exposure to harsh chemicals, frequent hand washing, or underlying health issues. Using moisturizers, wearing gloves when doing chores, and avoiding nail trauma can help strengthen brittle nails.
- Nail Discoloration: Nails can become discolored due to various reasons, including fungal infections, trauma, or certain medications. Yellow, white, green, or brown discoloration can occur.
- Nail Ridging: Vertical or horizontal ridges on the nails can be associated with aging, nutritional deficiencies, or certain medical conditions. Treatment may involve addressing the underlying cause.
- Beau’s Lines: Beau’s lines are transverse depressions or grooves that can appear across the nails. They are often a sign of a temporary interruption in nail growth, such as illness, injury, or severe stress.
- Onycholysis: Onycholysis is the separation of the nail from the nail bed, usually starting at the tip and progressing backward. It can result from trauma, fungal infections, psoriasis, or certain medications.
- Hangnails: Hangnails are small, painful tears of the skin around the nail. They can be caused by dry skin, frequent nail biting, or excessive cuticle trimming. Moisturizing and avoiding picking or biting can help prevent them.
- Nail Clubbing: Nail clubbing is a condition in which the fingertips become enlarged, and the nails curve downward. It can be associated with underlying respiratory or cardiac problems and should be evaluated by a healthcare professional.
- White Spots (Leukonychia): White spots or streaks on the nails can be caused by minor trauma or nail injuries. They are usually harmless and grow out as the nail grows.
How to Maintain Nail Hygiene
Maintaining proper nail hygiene is essential for keeping your nails clean, healthy, and free from infections. Here are some tips to help you maintain good nail hygiene:
- Regular Cleaning:
- Wash your hands and nails thoroughly with mild soap and warm water. Use a nail brush to clean under the nails gently.
- Trim and File Nails:
- Keep your nails at a moderate length, not too long or too short.
- Use sharp, clean nail clippers or scissors to trim your nails straight across, then gently round the corners. Avoid cutting them too short to prevent ingrown nails.
- Use a nail file to shape and smooth the edges of your nails. File in one direction to prevent nail splitting.
- Cuticle Care:
- Avoid cutting your cuticles, as they serve as a protective barrier against infections. Instead, use a cuticle pusher to push back the cuticles if needed gently.
- Moisturize:
- Apply a moisturizing hand and nail cream or lotion regularly to keep your nails and surrounding skin hydrated. Pay attention to the cuticles and the skin around the nails.
- Nail Polish and Polish Remover:
- Limit the use of nail polish removers that contain acetone, as they can dry the nails.
- When applying nail polish, use a clear base coat to protect your nails from staining and provide a smooth surface.
- Protect Your Nails:
- Wear gloves when doing household chores that involve water, cleaning chemicals, or prolonged exposure to moisture.
- Use gloves when gardening or performing activities that could cause trauma to the nails.
- Avoid Biting and Picking:
- Refrain from biting your nails or picking at them, as this can damage both the nails and the surrounding skin. Consider using nail-biting deterrent products if necessary.
- Proper Foot Care:
- Maintain good hygiene for your toenails by washing and drying your feet regularly.
- Trim toenails straight across to prevent ingrown toenails.
- Clean Nail Tools:
- If you use nail clippers, files, or other tools, make sure they are clean and sanitized. Disinfect your tools regularly to prevent the spread of bacteria or fungus.
- Healthy Diet:
- Consume a balanced diet rich in vitamins, minerals, and protein, as this can promote strong and healthy nails. Biotin, found in foods like eggs and nuts, is known to support nail health.
- Regular Checkups:
- If you notice any changes in the color, texture, or shape of your nails, or if you have persistent nail problems, consult a dermatologist or healthcare professional for proper diagnosis and treatment.
- Avoid Harsh Chemicals:
- Be cautious when using strong cleaning chemicals or nail products. Use protective gloves when necessary.
Nail Care Products
There are various nail care products available in the market to help you maintain healthy and beautiful nails. Here are some common types of nail care products and their purposes:
- Nail Clippers/Scissors: These are essential tools for trimming your nails. Nail clippers come in different shapes and sizes for both fingernails and toenails.
- Nail Files/Emery Boards: Nail files are used to shape and smooth the edges of your nails after trimming. Emery boards are available in various grits, from coarse to fine, depending on your needs.
- Cuticle Pushers/Nippers: Cuticle pushers are used to gently push back the cuticles, keeping them neat and healthy. Cuticle nippers can be used to trim excess cuticle skin, but be cautious not to cut too much.
- Nail Buffers: Nail buffers have different surfaces for smoothing, buffing, and shining your nails. They can help remove ridges and create a glossy finish without using nail polish.
- Nail Brushes: Nail brushes have stiff bristles and are designed for cleaning under your nails and around your cuticles. They are handy for removing dirt and debris.
- Nail Polish Remover: Nail polish removers come in various types, including acetone and non-acetone versions. Acetone is effective at removing nail polish but can be drying to the nails and skin. Non-acetone removers are milder but may require more effort to remove polish.
- Nail Polish: Nail polish comes in a wide range of colors and finishes. Base coats, color coats, and top coats are used to create a polished look, protect the nails, and enhance the longevity of the polish.
- Nail Strengtheners/Hardeners: These products are formulated to strengthen weak or brittle nails. They often contain ingredients like biotin, calcium, and keratin.
- Nail and Cuticle Creams/Lotions: These moisturizing products help keep your nails and surrounding skin hydrated. They can prevent dryness, cracking, and hangnails.
- Nail Growth Serums: Some serums are designed to promote nail growth and strengthen nails over time. They often contain vitamins and nutrients that support nail health.
- Nail Masks and Treatments: Specialty masks and treatments are available to address specific nail concerns, such as nail hydration, whitening, or nail repair.
- Nail Glue and Adhesive: Nail glue is used for applying artificial nails, nail tips, or repairing broken nails. It’s essential to use it sparingly and follow the instructions carefully.
- Nail Polish Corrector Pens: These pens have a fine tip soaked in nail polish remover, making it easier to clean up polish mistakes and achieve a neat manicure.
- Nail Drying Spray/Drops: These products help speed up the drying process of nail polish, reducing the risk of smudging and smearing.
- Nail Art Supplies: If you’re into nail art, you can find various supplies like nail decals, stickers, rhinestones, and nail art brushes to create intricate designs.
Nail Art
Nail Art Trends
Nail art trends are continually evolving, with new styles and techniques emerging regularly. These trends are often influenced by fashion, pop culture, seasons, and creative inspiration. Here are some nail art trends that have been popular in recent years:
- Minimalist Nail Art: Simple and understated designs, such as single-color nails with a minimalist accent like a single line or dot, have gained popularity. This style focuses on clean lines and negative space.
- Negative Space Nails: Negative space nail art incorporates bare or transparent areas into the design. It often combines painted patterns with exposed natural nails, creating a chic and edgy look.
- Abstract Nail Art: Abstract designs, including swirls, geometric shapes, and painterly strokes, have become trendy. These designs allow for creativity and individual expression.
- Pastel Colors: Soft and pastel nail polish colors, such as lavender, mint green, and baby blue, have been in vogue for a fresh and feminine look.
- French Tips Reinvented: Modern twists on the classic French manicure, like colorful tips or different shapes (e.g., diagonal or reverse French tips), have gained popularity.
- Chrome and Metallic Nails: Chrome and metallic nail polishes create a high-shine, futuristic look. Chrome powders and metallic foils are often used for a reflective finish.
- Matte Nails: Matte nail polish has become a staple for those seeking a trendy, non-glossy finish. Matte topcoats can be applied over any nail color to achieve this effect.
- Ombre and Gradient Nails: Ombre nails feature a smooth color transition from one shade to another. Gradient nails blend two or more colors for a stunning gradient effect.
- Animal Print Nails: Animal prints like leopard, zebra, and snakeskin patterns have made a comeback in nail art. These designs can be bold and eye-catching.
- Marble Nails: Marble nail art mimics the appearance of marble stone with soft, swirling patterns. Water marbling or nail polish stamping techniques are often used to achieve this look.
- Tie-Dye Nails: Tie-dye patterns have found their way onto nails, creating vibrant and psychedelic designs. Nail artists use various colors to achieve the tie-dye effect.
- Nail Stickers and Decals: Nail stickers, decals, and wraps make it easy to achieve intricate designs without advanced nail art skills. They come in various themes and styles.
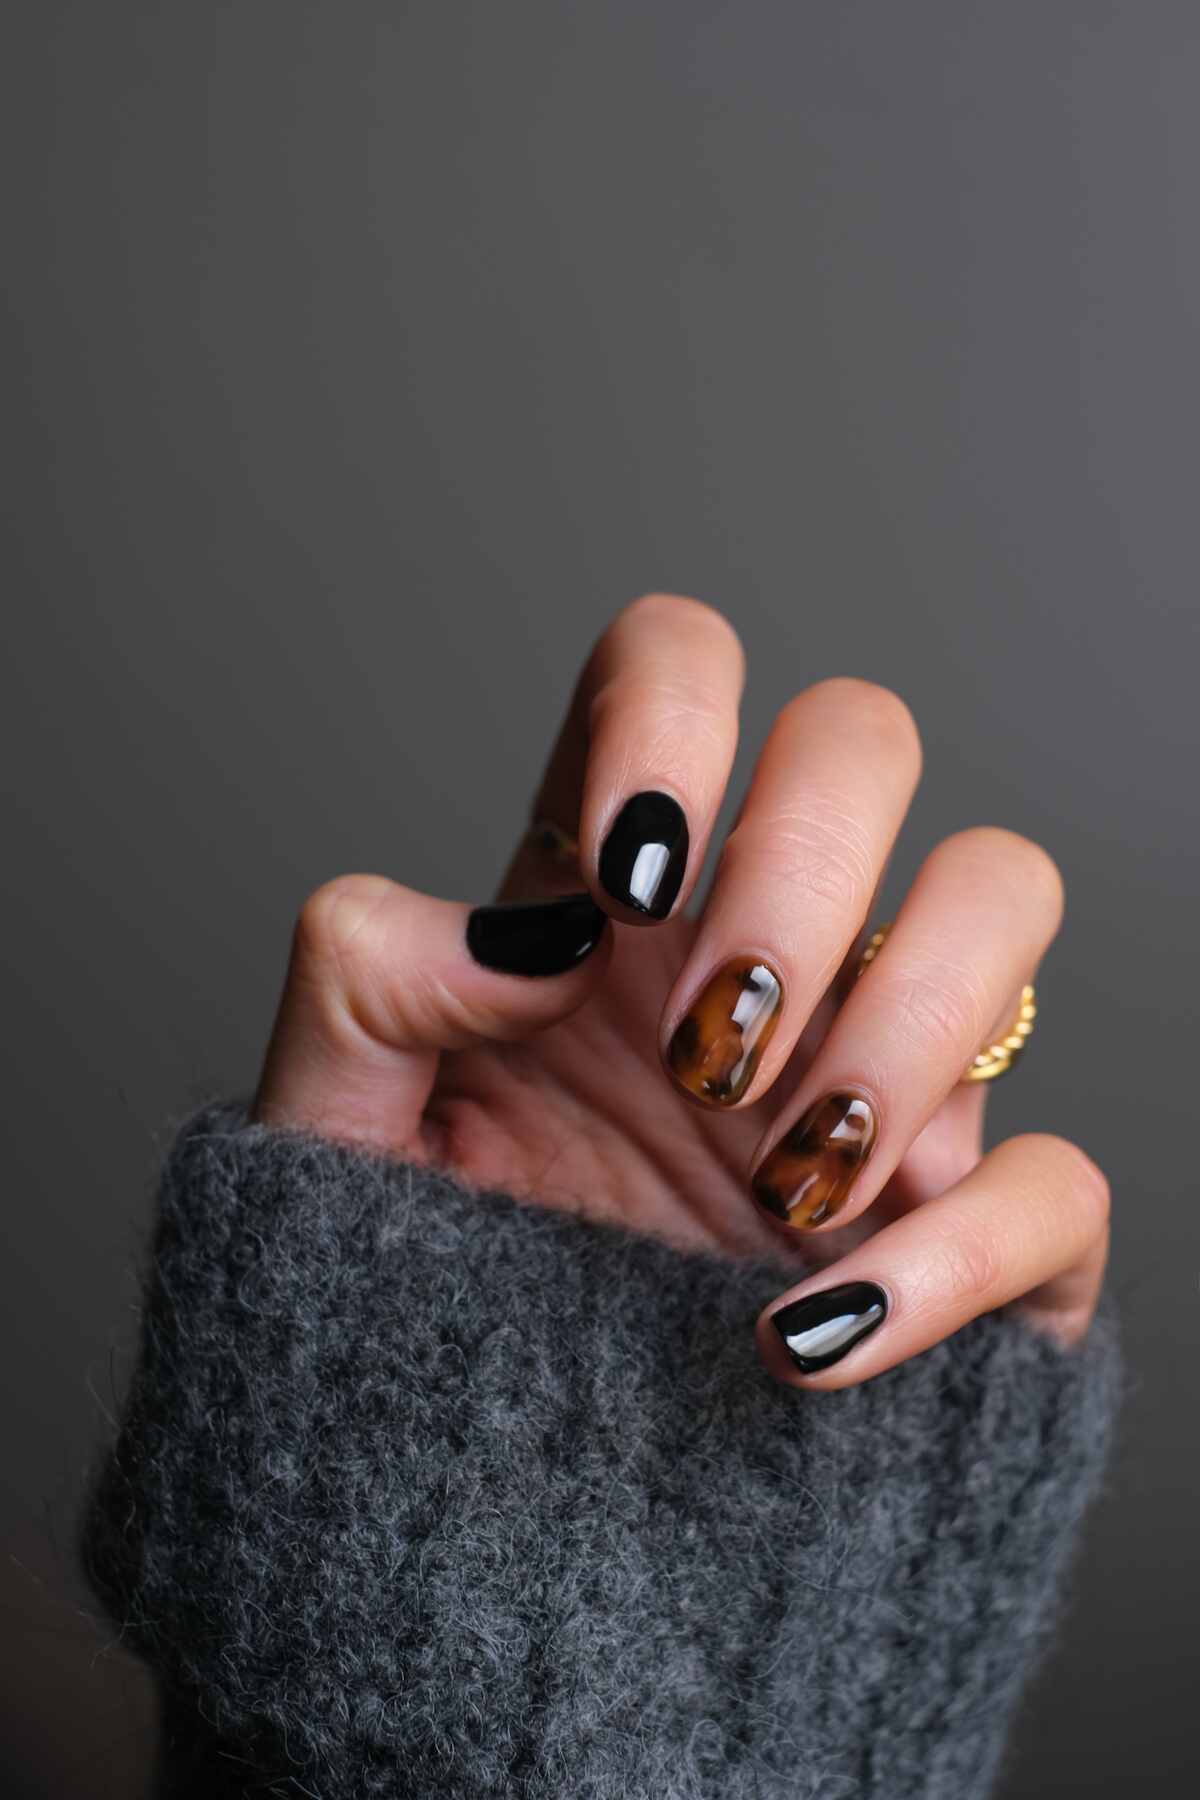
- Mix and Match Nails: Creating a different nail design on each nail is a trend known as mix and match nails. This style allows for a wide range of creative possibilities.
- Foil Nail Art: Foil nail art involves applying metallic or holographic foil to the nails for a shiny and reflective finish. Foils can be used in various designs and patterns.
- Jelly Nails: Jelly nails feature translucent, see-through nail extensions or polish for a unique and playful look. They can be combined with various colors and designs.
DIY Nail Art Ideas
Creating DIY nail art at home can be a fun and creative way to express yourself and experiment with different designs. Here are some DIY nail art ideas and techniques to get you started:
- Classic French Manicure:
- A classic French manicure features natural-looking pink or nude nails with white tips. You can achieve this by using nail guides or striping tape to create clean, even lines.
- Polka Dots:
- Use a dotting tool or the end of a bobby pin to create polka dot designs on your nails. Experiment with different colors and spacings for a playful look.
- Gradient/Ombre Nails:
- Create a gradient effect by blending two or more nail polish colors. You can use a makeup sponge to achieve a smooth transition between colors.
- Stripes and Lines:
- Use striping tape or thin brushes to create stripes, lines, and geometric patterns on your nails. Experiment with various color combinations and thicknesses.
- Water Marble Nails:
- Water marbling involves dropping nail polish into water and creating unique swirling patterns before dipping your nails into the design. It can be messy but produces stunning results.
- Tape Manicure:
- Apply strips of tape on your nails to create crisp, clean lines and geometric shapes. After painting over the tape, carefully remove it to reveal the design.
- Stenciled Nails:
- Use nail stencils or vinyl stickers to create intricate designs, such as flowers, hearts, or stars, with ease. Apply the stencil, paint over it, and then remove it to reveal the design.
- Marble Stone Nails:
- Achieve a marble stone effect by layering different nail polish colors on your nails and then swirling them together with a toothpick or nail art brush.
- Glitter Accent Nails:
- Apply a glitter polish or loose glitter to one or two accent nails for a touch of sparkle. You can also create glitter gradients or use glitter to outline other nail art designs.
- Animal Print Nails:
- Experiment with animal print patterns like leopard spots, zebra stripes, or snakeskin. You can use nail art brushes or dotting tools to create these designs.
- Floral Nail Art:
- Paint delicate flowers or floral patterns on your nails using nail art brushes. Different colors and flower types can create a variety of looks.
- Tropical Nail Art:
- Create a tropical vibe with nail art inspired by palm trees, pineapples, or hibiscus flowers. Bright and vibrant colors work well for this style.
- Comic Book Nails:
- Channel your inner superhero by painting comic book-inspired designs like speech bubbles, dots, and comic book characters on your nails.
- Mosaic Nails:
- Use small pieces of nail foil, broken nail polish pieces, or even cut-up magazine images to create a mosaic effect on your nails.
- Abstract Art:
- Let your creativity flow by creating abstract nail art using various colors, shapes, and brush strokes for a unique and artsy look.
Nail Art Tools
To create intricate and detailed nail art, you’ll need a variety of nail art tools. These tools help you achieve different designs and effects. Here are some essential nail art tools:
- Nail Brushes:
- Nail brushes come in various sizes and shapes, including round, flat, and angled. They are used for painting fine lines, creating intricate designs, and adding details to your nail art.
- Dotting Tools:
- Dotting tools have rounded tips and come in different sizes. They are perfect for creating dots and small details, like flower centers or eyes on nail art characters.
- Striping Tape:
- Striping tape is a thin, adhesive tape that is used to create clean and precise lines and stripes on your nails. It’s often used for geometric nail art designs.
- Nail Art Stencils and Vinyls:
- Nail stencils and vinyls are pre-cut designs that can be applied to your nails as templates. They help you achieve intricate patterns and shapes with ease.
- Sponge or Makeup Sponge:
- Sponges are used for creating gradient or ombre nail designs. They help blend colors seamlessly.
- Nail Art Pens:
- Nail art pens have fine-tipped applicators for drawing lines and creating detailed designs directly on your nails. They often come in various colors.
- Nail Art Brushes with Striper Brushes:
- These brushes have dual ends, one with a regular brush for larger areas and one with a thin striper brush for fine lines.
- Nail Art Wheels:
- Nail art wheels are small, plastic wheels with attached nail tips that you can use for practicing and testing out different nail art designs.
- Nail Drill or Electric File (For Professional Use):
- Nail drills are used to shape and file acrylic or gel nails. Trained professionals should use them as they require skill to avoid damaging natural nails.
- Nail Art Tweezers:
- Tweezers with pointed tips are helpful in applying small decals, studs, rhinestones, and other embellishments to your nails.
- Nail Polish Thinner:
- Thinner nail polish is used to restore the consistency of thickened nail polish, making it easier to work with.
- Clean-Up Brush or Angled Brush:
- These brushes are used with acetone or nail polish remover to clean up mistakes and remove excess polish around the nail.
- Matte Top Coat:
- A matte top coat is used to create a non-glossy finish for nail designs that require a matte look.
- UV or LED Lamp (For Gel Polish):
- If you’re using gel nail polish, you’ll need a UV or LED lamp to cure and harden the polish. This is typically for more advanced nail art.
- Nail Glue:
- Nail glue is used to adhere nail decorations, such as rhinestones, studs, or gems, securely to your nails.
- Nail Polish Corrector Pen:
- A nail polish corrector pen contains nail polish remover and a fine-tip applicator for precise clean-up of nail polish mistakes.
- Nail Art Storage:
- Consider organizing your nail art tools with a storage container, nail art brush holder, or nail art supply box to keep everything neat and accessible.
Nail Art Techniques
Creating stunning nail art involves various techniques and methods, each allowing for different designs and effects. Here are some popular nail art techniques to try:
- Freehand Nail Art:
- Freehand nail art involves painting directly onto the nail without the use of stencils or guides. You can create intricate designs, patterns, and illustrations with nail brushes and nail polish.
- Water Marbling:
- Water marbling involves dropping nail polish into a cup of water and creating a design by swirling the colors together. You then dip your nails into the pattern to transfer it onto your nails. It can be messy but results in unique and eye-catching designs.
- Stamping Nail Art:
- Nail stamping uses special nail plates with engraved designs. You apply nail polish to the design, scrape off excess polish, and then transfer the pattern onto your nails using a stamp. It’s a quick and easy way to achieve intricate designs.
- Gradient/Ombre Nails:
- Gradient nails involve blending two or more colors on your nails to create a smooth transition of shades. You can use a makeup sponge or a sponge applicator for this technique.
- Dotting Tool Nail Art:
- Dotting tools come in various sizes and are perfect for creating dots and small details on your nails. You can use them to make flowers, patterns, and more.
- Tape Nail Art:
- Tape nail art involves using striping tape or regular adhesive tape to create clean lines, geometric shapes, and patterns on your nails. After painting over the tape, you remove it to reveal the design.
- Nail Stencils/Vinyls:
- Nail stencils or vinyls are pre-cut designs that you can apply to your nails as templates. You paint over them and then remove the stencil to reveal the design.
- Sticker and Decal Nail Art:
- Nail stickers, decals, and wraps make it easy to apply intricate designs without advanced nail art skills. They come in various themes and styles.
- Sponge Nail Art:
- Sponge nail art involves using a makeup sponge to create gradient effects or textured looks by layering different colors of nail polish.
- Layering and Blending:
- Layering nail polish colors and blending them using a brush or sponge can result in unique color combinations and textures.
- Nail Foil Art:
- Nail foils are metallic or holographic sheets that can be transferred onto the nails to create shiny and reflective designs.
- Nail Taping and Striping:
- Taping and striping involve creating designs using adhesive tape or striping tape to create geometric shapes, lines, or patterns on the nails.
- Dry Brush Technique:
- The dry brush technique involves removing most of the nail polish from a brush and lightly brushing it over your nails to create a distressed or textured look.
- Texture Nail Art:
- Texture nail art includes adding textured elements to your nails, such as sand, glitter, or caviar beads, for a unique and tactile effect.
- 3D Nail Art:
- 3D nail art uses embellishments like rhinestones, studs, gems, or tiny charms to create three-dimensional designs on your nails.
Nail Health
Nail health is an essential aspect of overall hand and foot care. Healthy nails not only look good but also serve as indicators of your overall well-being. Here are some critical aspects of nail health and tips to maintain it:
- Nail Hygiene:
- Keep your nails clean by regularly washing them with mild soap and warm water. Use a nail brush to clean under the nails gently.
- Proper Nail Trimming:
- Trim your nails regularly to maintain a moderate length. Use sharp, clean nail clippers or scissors and avoid cutting them too short to prevent ingrown nails.
- Moisturize:
- Apply a moisturizing hand and nail cream or lotion daily to keep your nails and surrounding skin hydrated. Pay attention to the cuticles and the skin around the nails.
- Cuticle Care:
- Avoid cutting your cuticles, as they serve as a protective barrier against infections. Instead, use a cuticle pusher to push back the cuticles if needed gently.
- Nail Polish and Polish Remover:
- Limit the use of nail polish removers that contain acetone, as they can dry the nails and skin.
- Use a clear base coat when applying nail polish to protect your nails from staining and provide a smooth surface.
- Protect Your Nails:
- Wear gloves when doing household chores that involve water, cleaning chemicals, or prolonged exposure to moisture.
- Use gloves when gardening or performing activities that could cause trauma to the nails.
- Avoid Biting and Picking:
- Refrain from biting your nails or picking at them, as this can damage both the nails and the surrounding skin. Consider using nail-biting deterrent products if necessary.
- Healthy Diet:
- Consume a balanced diet rich in vitamins, minerals, and protein, as this can promote strong and healthy nails. Biotin, found in foods like eggs and nuts, is known to support nail health.
- Stay Hydrated:
- Proper hydration is essential for overall health, including the health of your nails. Drink plenty of water to keep your nails and skin well-hydrated.
- Regular Checkups:
- If you notice any changes in the color, texture, or shape of your nails, or if you have persistent nail problems, consult a dermatologist or healthcare professional for proper diagnosis and treatment.
- Nail Protection:
- If you engage in activities that put your nails at risk of trauma or injury, such as sports or manual labor, consider using protective gloves or tools to prevent damage.
- Limit Exposure to Harsh Chemicals:
- Be cautious when using strong cleaning chemicals or nail products. Use protective gloves when necessary.
- Gentle Nail Care:
- Be gentle with your nails when performing tasks. Avoid using them as tools for scraping, opening containers, or prying objects.
- Proper Foot Care:
- Maintain good hygiene for your toenails by washing and drying your feet regularly. Trim toenails straight across to prevent ingrown toenails.
- Nail Supplements:
- If you have weak or brittle nails, consider taking nail supplements containing biotin, vitamins, and minerals to promote nail health. Consult with a healthcare professional before starting any supplements.
Nail Extensions
Nail extensions are a popular cosmetic technique used to create longer and more durable nails. They are often sought after by individuals who desire extended nail length or want to enhance the appearance of their natural nails. There are different methods for applying nail extensions, and each has its advantages and considerations. Here are some common types of nail extensions and how they work:
- Acrylic Nail Extensions:
- Acrylic extensions involve using a mixture of liquid monomer and powdered polymer to create a paste that can be sculpted onto the natural nail or applied over a nail tip.
- The paste hardens when exposed to air, creating a strong and durable extension.
- Acrylic extensions can be shaped, filed, and polished to achieve the desired look.
- Maintenance is required as the natural nail grows, and acrylic extensions typically need to be filled every 2-3 weeks.
- Gel Nail Extensions:
- Gel extensions are made by applying a gel product to the natural nail or a nail tip and then curing it under a UV or LED lamp.
- The gel is available in various viscosities, including hard gels and soft gels, to create different levels of thickness and flexibility.
- Gel extensions are known for their natural appearance and flexibility.
- Like acrylics, gel extensions require maintenance as the natural nail grows, and fills are needed approximately every 2-3 weeks.
- Fiberglass or Silk Wrap Extensions:
- Fiberglass or silk wrap extensions involve applying a layer of fiberglass or silk fabric on the natural nail and then sealing it with resin or a gel topcoat.
- These extensions provide added strength and can be used for repair or to create longer nails.
- Fiberglass or silk extensions are thinner and more flexible compared to acrylic or gel extensions.
- Dip Powder Extensions:
- Dip powder extensions involve applying a bonding agent to the natural nail, dipping it into colored acrylic powder, and repeating the process to build layers.
- The layers are then sealed with an activator, creating a hardened and durable extension.
- Dip powder extensions are known for their strength and long-lasting results.
- Like other extensions, they require maintenance as the natural nail grows.
- Press-On Nails:
- Press-on nails are pre-made artificial nails that can be adhered to natural nails using adhesive tabs or nail glue.
- They are a temporary and easy-to-apply option for those seeking an instant nail extension.
- Press-on nails can be removed and reapplied as needed, making them a convenient choice for special occasions.
Nail Polish
Nail polish, also known as nail enamel or nail varnish, is a cosmetic product applied to the fingernails and toenails to enhance their appearance and provide color. It is one of the most popular beauty products and comes in a wide variety of colors, finishes, and formulations. Here are some critical aspects of nail polish:
Components of Nail Polish:
Nail polish typically consists of several key components:
- Solvents: Solvents are the liquid components of nail polish that keep it in a liquid form. Typical solvents include ethyl acetate and butyl acetate. These solvents evaporate when the nail polish dries, leaving behind the colored film on the nails.
- Pigments and Colorants: Pigments and colorants provide the color to the nail polish. They come in a wide range of shades and can be combined to create various nail polish colors.
- Resins: Resins are added to nail polish to improve its adhesion to the nails and enhance its durability.
- Plasticizers: Plasticizers are used to make the nail polish flexible and prevent it from becoming too brittle.
- Film-Forming Agents: These agents help the nail polish form a smooth and even film on the nails.
- Thickeners: Thickeners are added to adjust the consistency of the nail polish and prevent it from becoming too runny.
- Drying Agents: Drying agents accelerate the evaporation of solvents, helping the nail polish dry more quickly.
Types of Nail Polish:
There are various types of nail polish available to suit different preferences and needs:
- Regular Nail Polish: This is the standard nail polish that requires a base coat, one or more coats of color, and a top coat for a finished look. It dries by evaporation and typically lasts a few days to a week.
- Fast-Drying Nail Polish: Fast-drying nail polish formulas are designed to dry more quickly than regular polish, saving time during the manicure process.
- Gel Nail Polish: Gel polish is cured under a UV or LED lamp to create a rugged and durable finish. It can last for up to two weeks without chipping but requires special removal techniques.
- Matte Nail Polish: Matte nail polish dries to a non-glossy finish, creating a velvety, matte appearance on the nails.
- Glitter Nail Polish: Glitter nail polish contains tiny particles of glitter, providing a sparkling and eye-catching finish. It can be used as a top coat or for full coverage.
- Nail Stamping Polish: Nail stamping polishes are highly pigmented and designed for use with nail stamping plates to create intricate designs.
Application and Removal:
Here’s an essential guide to applying and removing nail polish:
Application:
- Start with clean, dry nails.
- Apply a base coat to protect the natural nails and improve nail polish adhesion.
- Apply one or more coats of colored nail polish, allowing each coat to dry before applying the next.
- Finish with a top coat to seal the color and add shine.
- Wait for the nail polish to dry completely.
Removal:
- Soak a cotton ball or pad in a nail polish remover containing acetone or a nail polish remover designed explicitly for gel polish if you’re wearing gel nails.
- Place the soaked cotton ball or pad on the nail and wrap it with aluminum foil, or use nail clips to hold it in place.
- Let it sit for a few minutes to soften the nail polish.
- Gently rub or push the softened nail polish off with a cuticle pusher or a cotton pad.
- Wash your hands and apply a moisturizing nail and cuticle oil.
Nail Salon
A nail salon is a specialized beauty establishment that offers a variety of nail care and grooming services for the hands and feet. These establishments are staffed with trained nail technicians who provide a range of services to help clients maintain healthy and attractive nails. Here are some standard services and features you can expect to find at a nail salon:
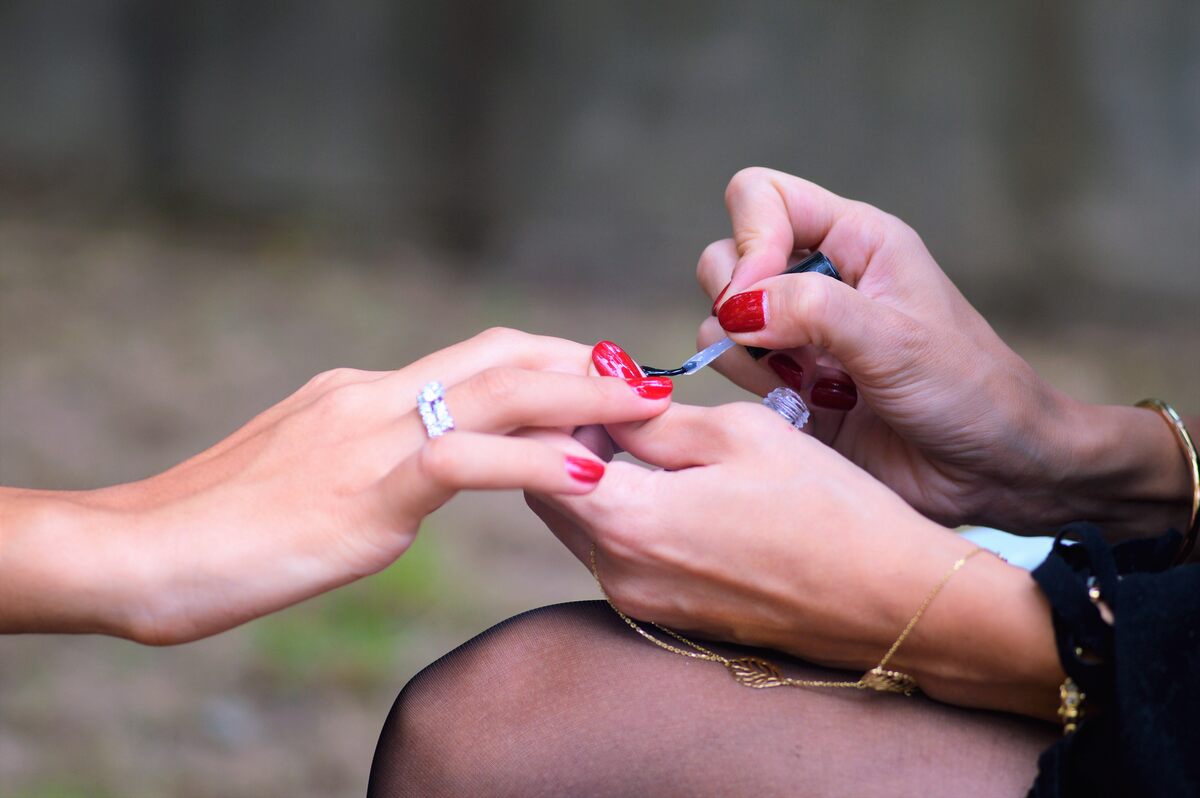
- Manicures:
- Manicures focus on the care and beautification of the hands and fingernails.
- Basic manicures typically include nail trimming, shaping, cuticle care, and nail polish application.
- Specialized manicures may include nail strengthening treatments, paraffin wax dips, or hand massages.
- Pedicures:
- Pedicures are treatments designed to care for the feet and toenails.
- Basic pedicures often involve soaking the feet, nail trimming, shaping, cuticle care, exfoliation, and nail polish application.
- More comprehensive pedicures may include callus removal, foot masks, or hot stone massages.
- Nail Extensions and Enhancements:
- Nail salons offer services to extend or enhance natural nails, such as acrylic nail extensions, gel nail extensions, and nail tips with overlays.
- These services can provide length and durability to the nails, allowing for various nail designs and styles.
- Nail Art:
- Nail art is a popular service that involves intricate designs and decorations applied to the nails. This can include hand-painted nail art, nail stamping, and the application of nail decals, rhinestones, or studs.
- Gel Polish and Gel Manicures:
- Gel polish is a long-lasting nail polish that requires curing under a UV or LED lamp. Gel manicures can last for up to two weeks without chipping and have a glossy finish.
- Nail Repair and Maintenance:
- Nail technicians can assess and repair damaged or broken nails, including the use of silk wraps, nail glue, and other techniques to strengthen and restore the nails.
- Spa Services:
- Some nail salons offer spa-like experiences with additional services such as aromatherapy, herbal baths, and massage chairs to enhance relaxation during nail treatments.
- Sanitation and Cleanliness:
- Nail salons are expected to follow strict sanitation and hygiene practices to ensure the safety and well-being of their clients. This includes the use of sterilized or disposable tools and regular cleaning of workstations.
- Retail Products:
- Many nail salons offer a selection of nail care and beauty products for sale, including nail polishes, cuticle oils, and hand creams.
- Nail Technicians and Licensing:
– Nail technicians in reputable nail salons are trained and licensed professionals who have completed courses in nail care and hygiene.
- Appointment Scheduling:
– Some nail salons offer online booking systems or phone-in appointments to accommodate client preferences and ensure timely service.
Nail Trends
Nail trends are constantly evolving, with new styles and designs emerging each season. Nail art and manicure trends are often influenced by fashion, pop culture, and creative inspiration. Here are some nail trends that have gained popularity in recent years:
- Minimalist Nails:
- Minimalist nail designs featuring simple and understated looks have become trendy. This includes single-color nails with subtle accents like a single line or small dot.
- Negative Space Nails:
- Negative space nail art incorporates bare or transparent areas into the design, often combining painted patterns with exposed natural nails.
- French Tips Reinvented:
- Modern take on the classic French manicure, such as colorful tips or different shapes (e.g., diagonal or reverse French tips), have gained popularity.
- Pastel Colors:
- Soft and pastel nail polish colors, including shades of lavender, mint green, and baby blue, have been in vogue for a fresh and feminine look.
- Chrome and Metallic Nails:
- Chrome and metallic nail polishes have been used to create a high-shine, futuristic appearance on the nails.
- Matte Nails:
- Matte nail polish, which dries to a non-glossy finish, has become a staple for those seeking a trendy, edgy look.
- Ombre and Gradient Nails:
- Ombre nails feature a smooth color transition from one shade to another, while gradient nails blend two or more colors for a stunning gradient effect.
- Marble Nails:
- Marble nail art, mimicking the appearance of marble stone with soft, swirling patterns, has been widespread. Various techniques, such as water marbling, are used to achieve this look.
- Animal Print Nails:
- Animal prints like leopard spots, zebra stripes, and snakeskin patterns have made a comeback in nail art, creating bold and eye-catching designs.
- Nail Stickers and Decals:
– Nail stickers, decals, and wraps make it easy to achieve intricate designs without advanced nail art skills. They come in various themes and styles.
- Mix and Match Nails:
– Creating a different nail design on each nail, known as mix and match nails, allows for a wide range of creative possibilities.
- Tie-Dye Nails:
– Tie-dye patterns, reminiscent of the 1960s and 1970s, have found their way onto nails, creating vibrant and psychedelic designs.
- Glitter Accent Nails:
– Adding a touch of sparkle with glitter polish or loose glitter on one or two accent nails is a popular choice.
- Abstract Nail Art:
– Abstract designs, including swirls, geometric shapes, and painterly strokes, have become trendy, allowing for creative expression.
- Jelly Nails:
– Jelly nails featuring translucent, see-through nail extensions or polish create a unique and playful look.
Nail Removal
Nail removal typically refers to the process of removing artificial nail extensions, such as acrylic nails or gel nails, from your natural nails. It’s essential to follow the correct procedures to ensure that your natural nails remain healthy and undamaged. Here’s a step-by-step guide on how to safely remove artificial nail extensions:
Materials You’ll Need:
- Acetone-based nail polish remover
- Cotton balls or cotton pads
- Aluminum foil or nail clips
- A nail file
- A cuticle pusher or orangewood stick
- A moisturizing nail and cuticle oil
Procedure:
- File the Surface: Use a nail file to file the top layer of the artificial nails gently. This step helps break the seal and allows the acetone to penetrate more effectively. Be cautious to avoid filing down to your natural nails.
- Prepare the Acetone: Pour enough acetone-based nail polish remover into a glass or ceramic bowl to submerge your fingertips fully. Acetone is the most effective way to remove acrylic and gel nails, but it can be drying, so you may want to apply a layer of petroleum jelly or cuticle oil around your nails to protect the surrounding skin.
- Soak Your Nails:
- Soak your fingertips in the bowl of acetone. If you’re using cotton balls or pads, saturate them with acetone and place them on your nails.
- Wrap each fingertip in aluminum foil or use nail clips to hold the soaked cotton balls or pads in place.
- Let your nails soak for about 15 to 20 minutes. During this time, you can gently rock your fingertips back and forth to help loosen the artificial nails.
- Check and Remove: After soaking, check if the artificial nails are loosened. If they haven’t softened completely, you can continue soaking for a few more minutes.
- Gently Remove: Using a cuticle pusher or orangewood stick, gently push and scrape off the softened artificial nails. Be careful not to force or pry them off, as this can damage your natural nails.
- Post-Removal Care:
- Once all the artificial nails are removed, use a nail buffer or file to smooth any remaining residue on your natural nails.
- Wash your hands thoroughly to remove any acetone residue.
- Apply a moisturizing nail and cuticle oil to rehydrate your nails and surrounding skin.
Tips:
- Do not forcefully scrape or pry off the artificial nails, as this can damage your natural nails.
- If you have gel nails, you may need to repeat the soaking and scraping process until all the gel is removed.
- If you experience any discomfort or notice signs of damage to your natural nails, consider seeking professional help from a nail technician or a dermatologist.
FAQs:
What Are the Best Nail Care Practices?
Maintaining healthy nails involves regular trimming, moisturizing, and avoiding harsh chemicals. Use quality nail care products, and don't forget to protect your nails from excessive moisture and trauma.
How Can I Strengthen My Nails Naturally?
Strengthen your nails naturally by maintaining a balanced diet rich in vitamins and minerals, avoiding excessive filing, and using a nail strengthener.
Are Acrylic Nails Harmful to My Natural Nails?
While acrylic nails can be safe when applied and maintained correctly, improper removal or overuse can damage natural nails. It's essential to follow proper procedures.
How Often Should I Visit a Nail Salon?
The frequency of salon visits depends on personal preference and nail health. Some visit every two weeks for maintenance, while others go less often. It's essential to keep a balance and not overdo it.
What Is the Right Way to Remove Nail Polish?
To remove nail polish effectively, use a non-acetone nail polish remover, apply it to a cotton pad, and gently rub your nails until the polish comes off. Avoid excessive scrubbing.
Conclusion
In this comprehensive guide, we’ve explored everything you need to know about nails, from their anatomy and care to the latest trends in nail art and maintenance. Remember, healthy and well-maintained nails not only enhance your appearance but also reflect your overall well-being. Whether you’re looking to master the art of DIY nail care or seeking professional advice, this guide is your go-to resource for all things related to nails. Embrace your creativity, pamper your nails, and let them shine!
Read Also: What Their Jewelry Store Doesn’t Want One To Know